Multicolor 3d printing
October 3, 2022 • ☕️ 5 min read
Translated into: Français
Recently, I needed to 3d print something in multicolor. My usual way of doing this is by defining a layer at which I change the spool. This is fine for some uses, but it doesn’t allow for multiple colors on the same layer. Then I found this very cool trick, that allows multicolor 3d printing on a single extruder printer.
Attention, however, this method requires manually changing the spool multiple times per layer (depending on how many colors you use). This means it’s adequate for prints with just a few colored layers such as logos and keychains, but not a full multicolor print.
As I couldn’t find much documentation on this method, here is a little tutorial on how to design 3d objects and print them in multicolor.
Design your files
This part is only if you wish to design your own object. In this tutorial, I will use fusion 360 to create a 3d multicolor logo in 2 colors, but it works for as many colors as you want. First, you need a .svg version of your logo. Here I will work on this one :

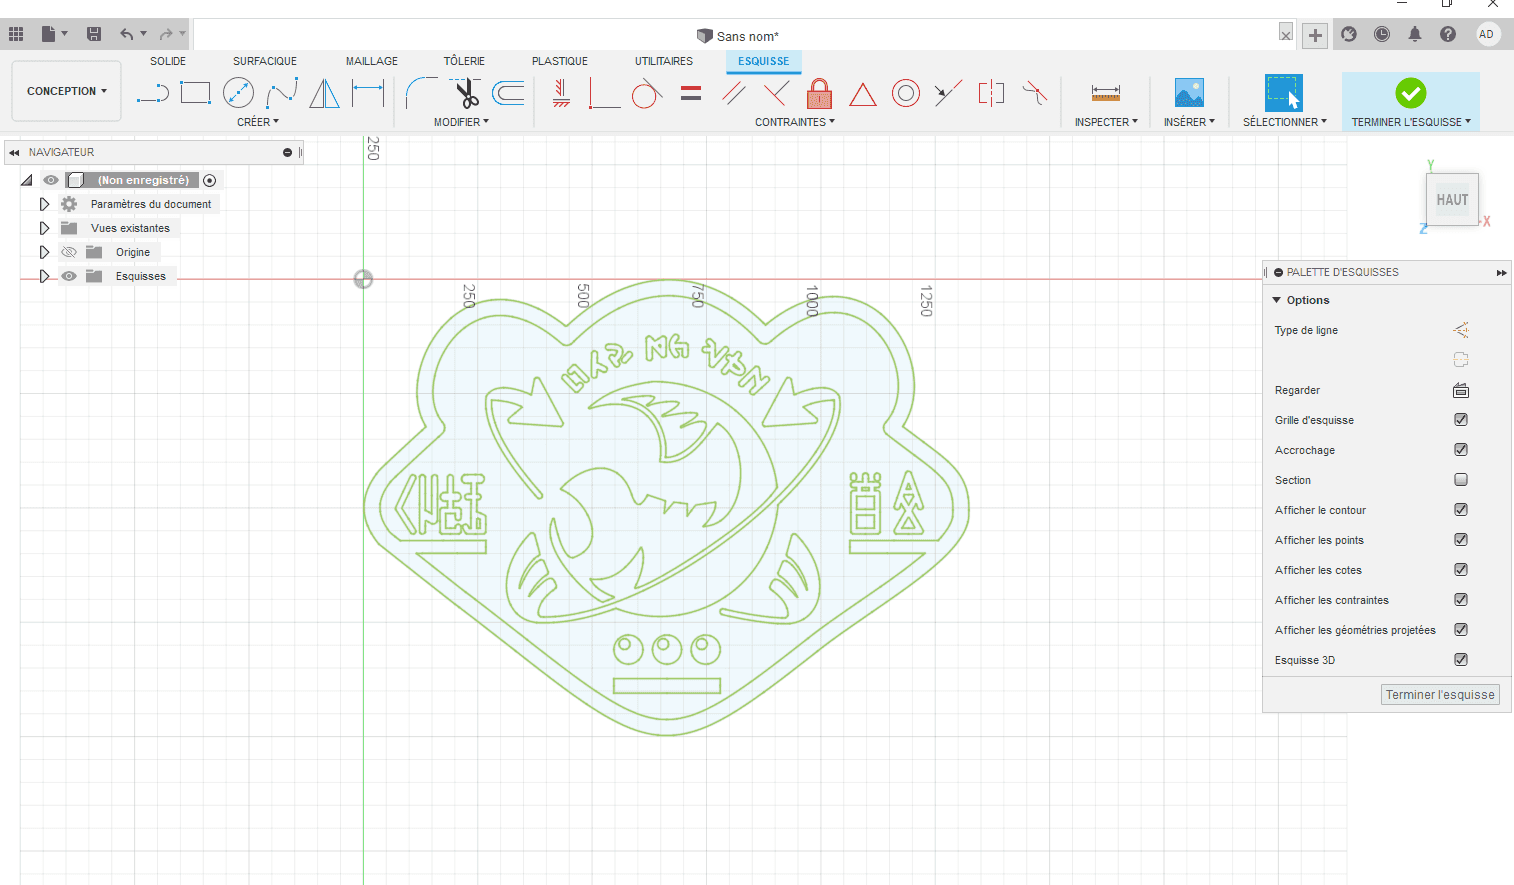
If you can’t find one, there are tools online to convert a png to a svg. Then, open fusion 360, start a sketch and import your svg.

It should appear like this :
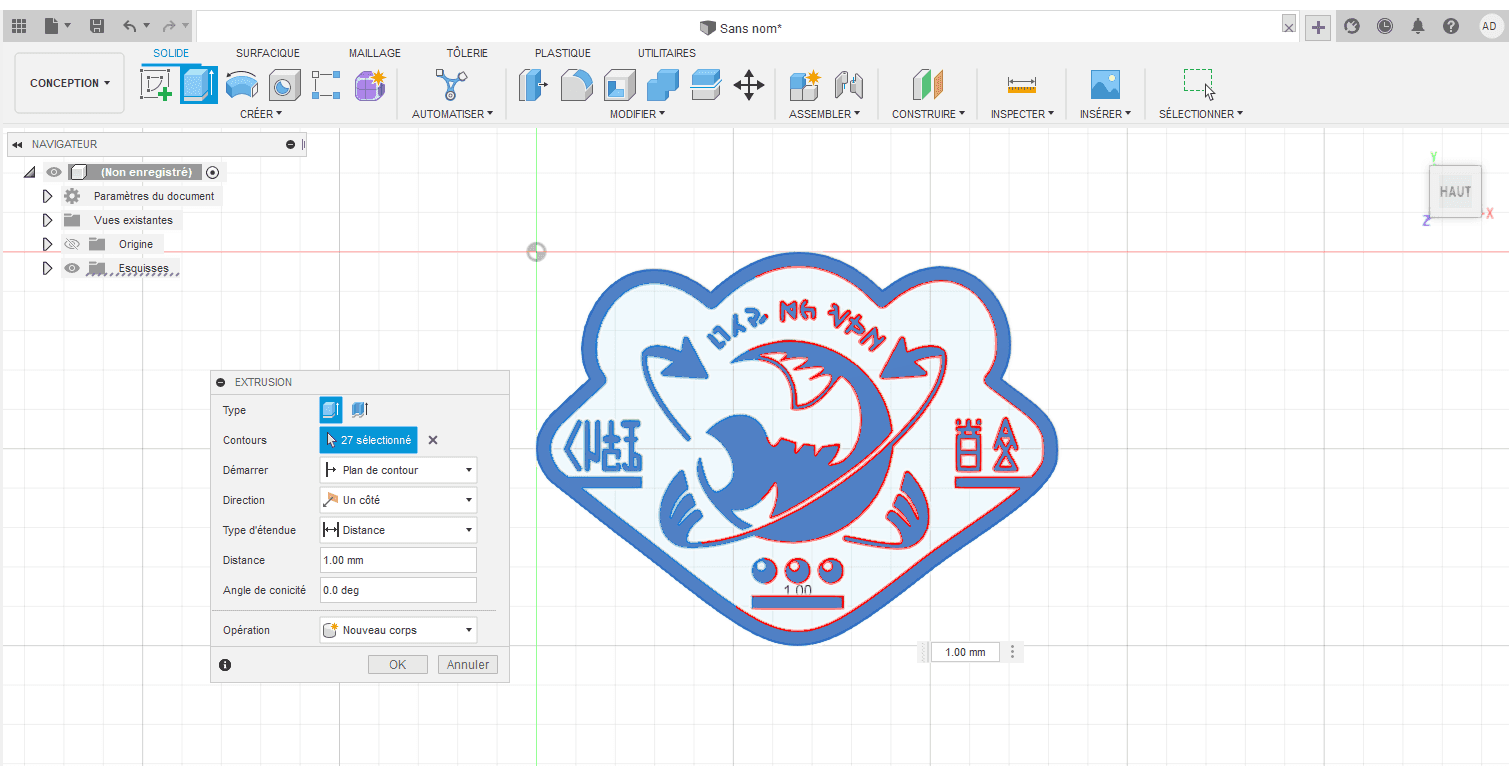
Then, extrude each color individually. I recommend extruding something like 0.5 or 1mm so it’s only 2-4 colored layers. Here’s what my black layer looks like.
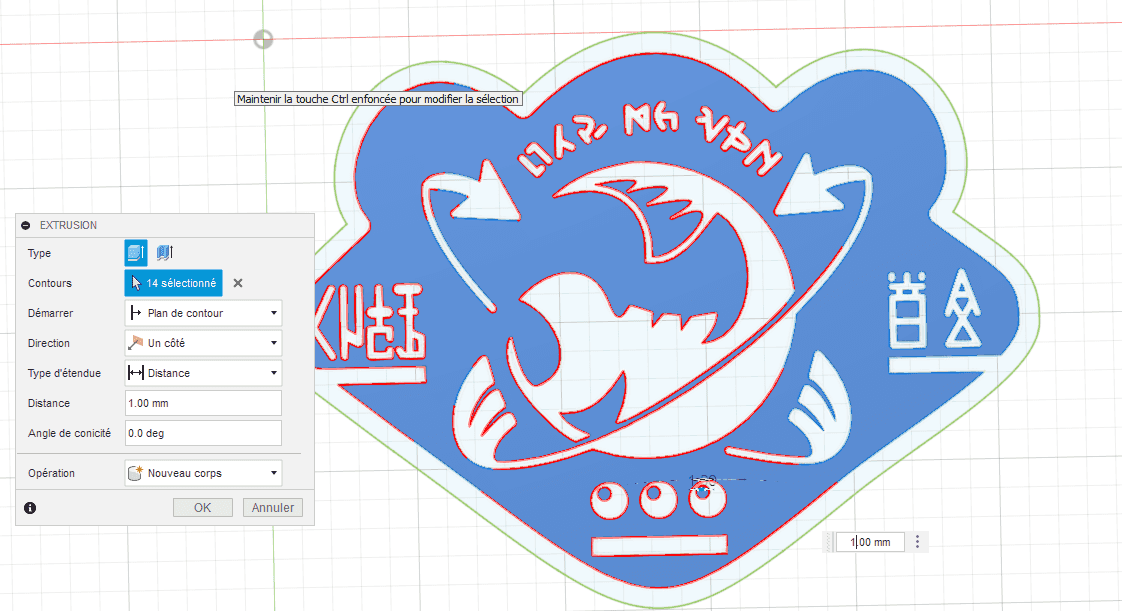
I like to do every color on the same file, so they stay lined up and it’s much easier to work with in the slicer. To add another color, I first save as an stl the one I just did, and then I just hide the previous extrusions and go back to the sketch to extrude some other parts. Here I extruded the rest of the svg :
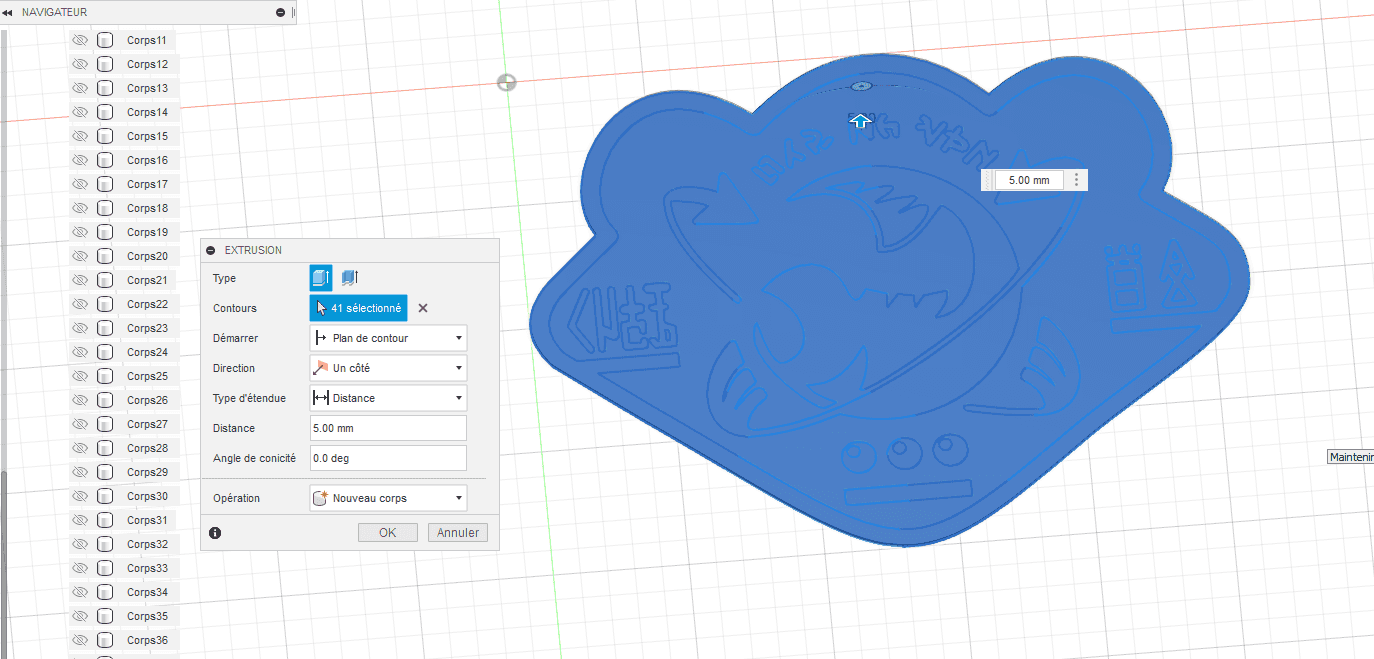
Now I usually also make a last piece that’s just the ‘shadow’ of my object. This part should be your desired height for your final object (minus 1 or 0.5mm for the colored layers). I plan to print this part in a single color so I don’t have to be next to the printer switching spools every 10 minutes.
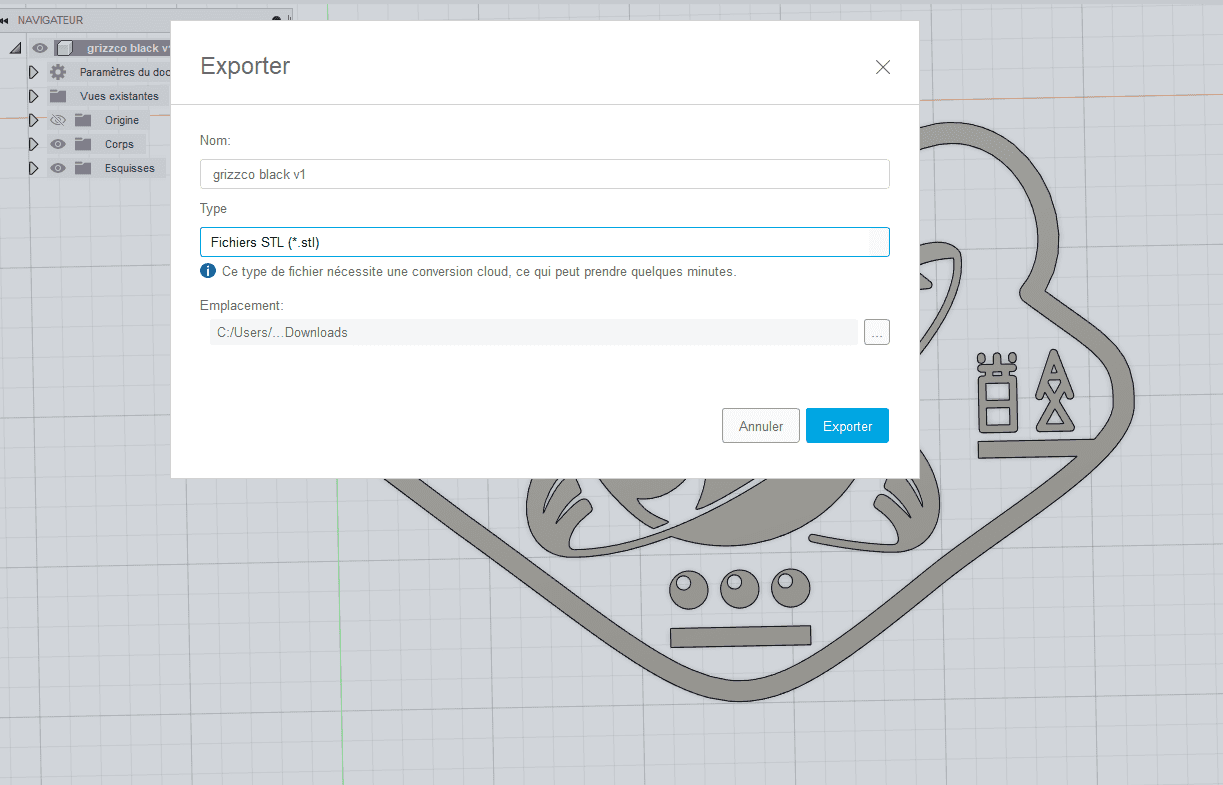
Don’t forget to export each part of your object as an stl !
Setting up your slicer
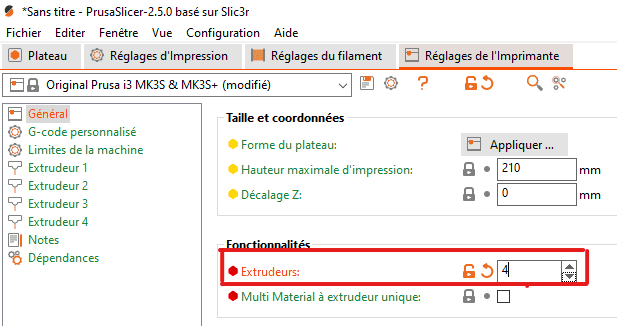
This is the most important part of the process. You need to tell your slicer you’re using a printer that has multiple extruders. To do that, select your usual config (in my case I’ll take the Original Prusa i3 MK3S & MK3S+ ). Then go to printer settings and set the number of extruders to at least the number of colors you’ll want to use (it’s alright if you set up more extruders than needed).
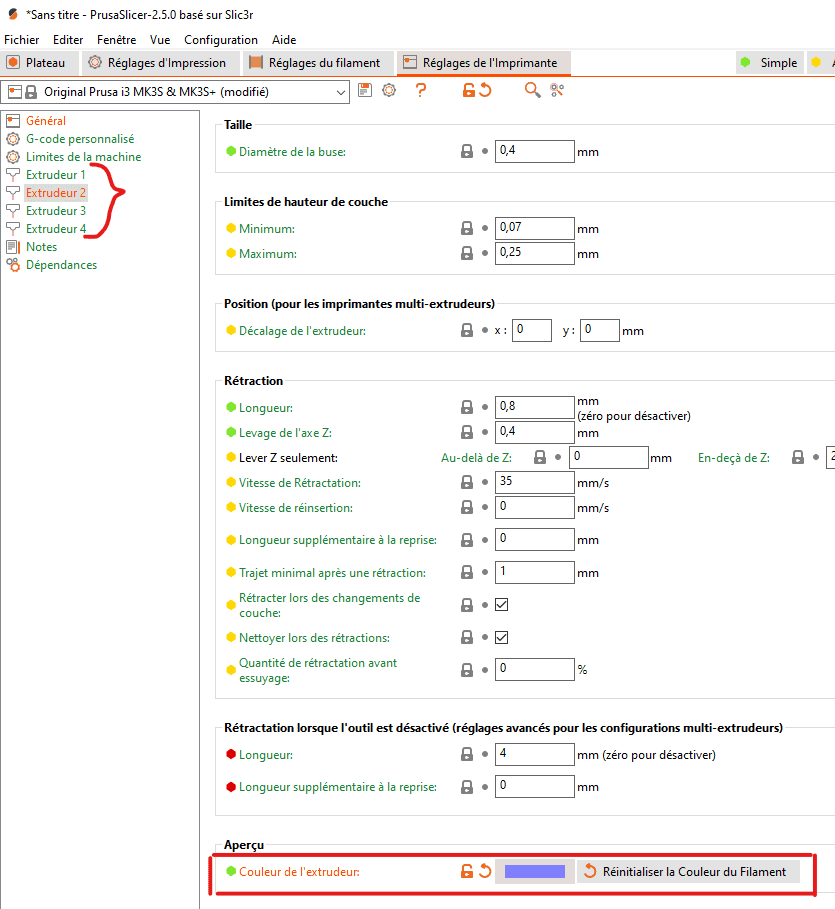
Now, for each extruder you should specify what is its color. It’s important to set the right colors because otherwise you won’t know which spool to put in your printer. To do that, simply select the extruder on the menu and specify its color at the bottom of the page.
Once your colors are all set up, go to your printer settings (still in the slicer) and add the following line in the custom gcode > after tool change section
M600; change to {next_extruder}
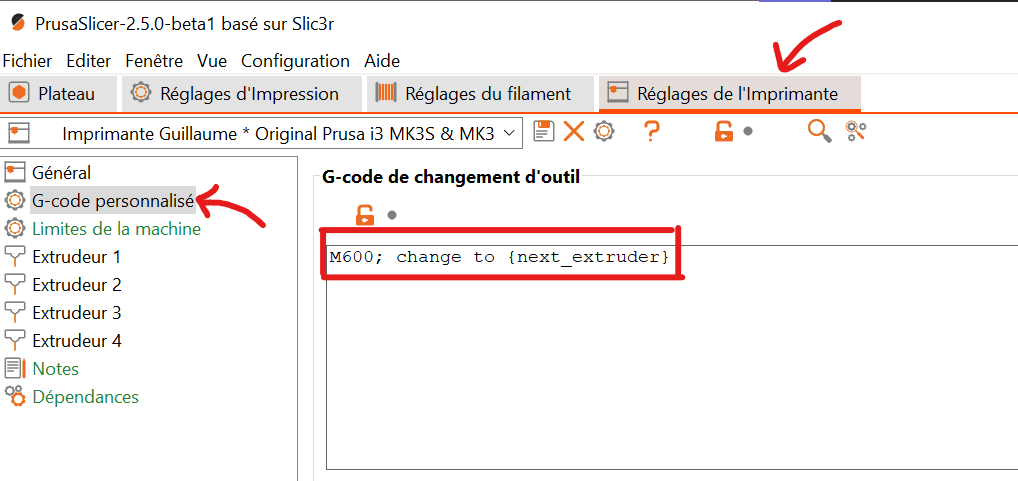
The M600 is the command that tells the printer to stop and let you change the spool.
change to {next_extruder} is a comment. This is how you know which spool you should load next.
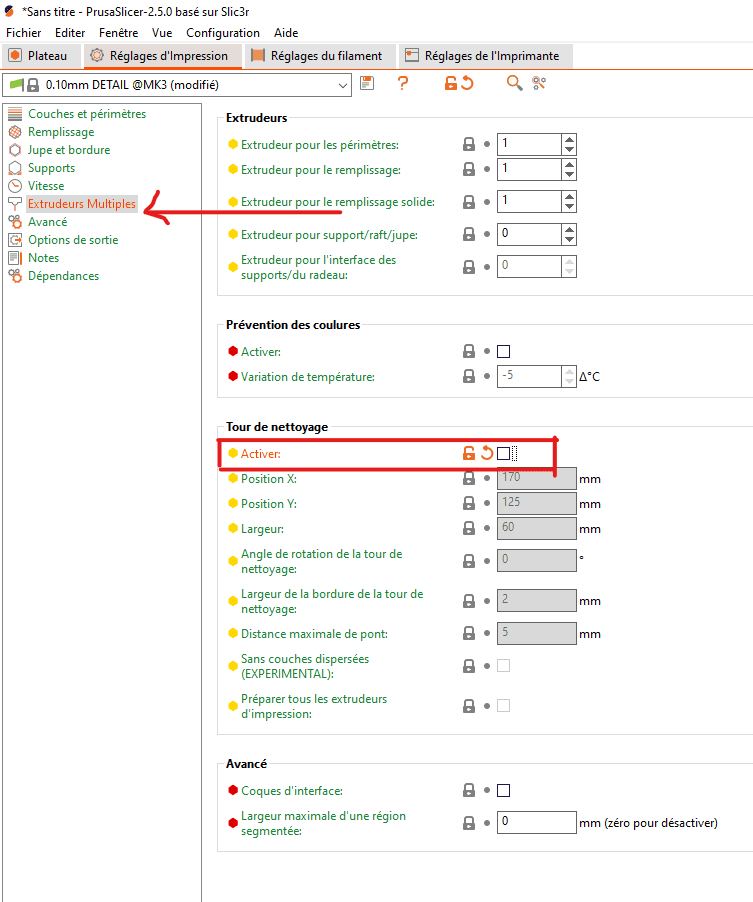
Also, the slicer will probably automatically add a ‘cleaning tower’. You can deactivate it in the printing settings > multiple extruders > cleaning tower, as will just waste plastic.
Your slicer is now ready for multicolor printing!
Printing time!
Alright, now that your slicer is ready, you can import your object as usual. But as your object is in multiple parts, you need to import all of them. Start by importing the ‘shadow’ part, and then add the colored parts by clicking this button :
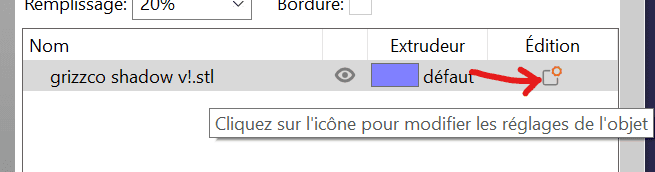
and then this one to add a new part

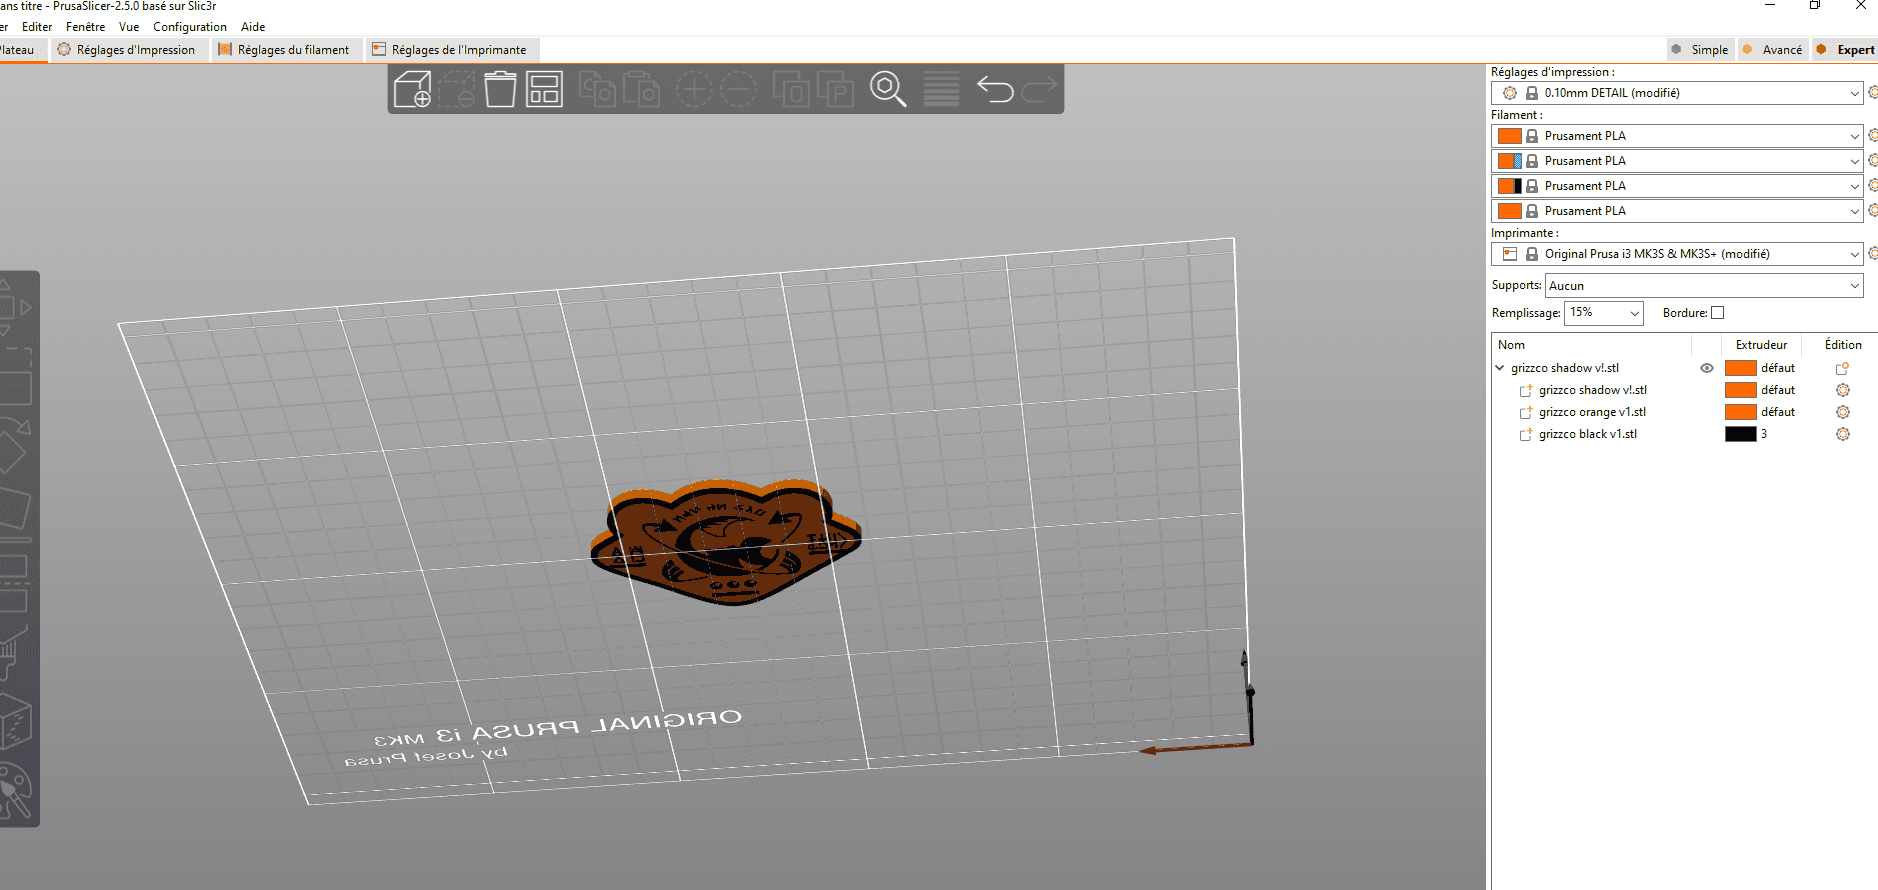
After importing all your parts, it should look something like that.
If you have a smooth printing area, I recommend printing the multicolor part against it, so your logo will be very smooth, and the printing traces will be less visible.
Start your print, and open the gcode in any text (or code) editor. Then CTRL+F 'M600' to find every time where you need to change spools. Next to the ‘M600’ command should appear which extruder you should switch to. This way you can keep track of where you’re at in your print and won’t mess up your colors.
Also, after changing the spool, the printer will extrude a blob of plastic. You should grab it with tweezers, but don’t pull it just yet (I know it’s tempting, but don’t), the printer will extrude another, smaller blob of plastic after you pressed the button to resume the print. Once you caught both blobs, you can pull on them to take them out.
TL;DR
- Make one object for each color
- Modify your printer config so the slicer thinks it has n extruders
- Change the gcode to insert the M600 command and comments after each tool change